The four edit modes: Tweak, Comment, Edit, Draw
After this, you'll know the four ways Claude Design lets you change a design (Tweak, Comment, Edit, and Draw), and you'll be able to pick the right one for the change in front of you instead of fighting the canvas.
Before you start
Complete Talk, don't drag: the canvas mental model first; this lesson turns that 'describe the fix' habit into the four specific tools the canvas gives you for it.
The idea
Once Claude has built your first design, you change it using one of four modes on the canvas toolbar: Tweak, Comment, Edit, and Draw. Each one fits a different kind of change. A mode here means a way of giving Claude instructions. The toolbar (the row of small buttons over your design) is where you switch between them.
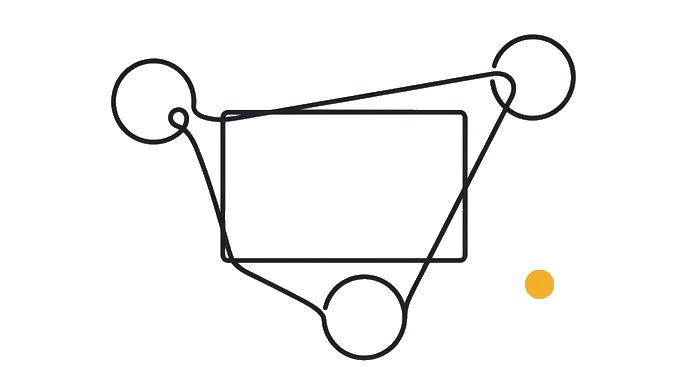
You met the main idea in the last module: you steer by describing, not dragging. These four modes are the specific tools for that.
Tweak is the one you will use most. You ask Claude in plain language ("make the header warmer," "add a pricing section"). Claude reads it and rebuilds that part. This is the everyday mode, and it is the one to reach for when you want Claude to do the work.
Comment lets you select one element on the page, then leave a note right on it, the way you would scribble in a margin. Claude reads the note and acts on it. Use it when a change is about one specific thing and you want to point at it instead of describing where it is.
Edit is the hands-on mode. It lets you change a property directly yourself: a color, a size, a font, the weight (how bold the letters are), the spacing. It feels closer to a traditional design app, where you adjust one setting at a time. Use it for a precise finish you would rather set by hand than describe.
Draw lets you draw right on top of the design, like circling something with a marker. You might circle an area and write "this feels empty." It is the most visual way to point, useful when words alone are clumsy.
Here is the before and after: Someone uses Tweak for everything, including a tiny one-pixel color nudge, and burns a full rebuild on a change they could have set by hand in Edit. A fluent user matches the mode to the moment: Tweak for "redo this section," Comment to flag one button, Edit to nudge a color, Draw to point at a gap.
Why four modes instead of one: some changes are big and conceptual, and some are small and exact. Asking Claude to rebuild for a one-shade color change is slow and spends from your allowance. Setting that shade yourself in Edit is instant. The skill is knowing which size of change you are making.
Tweak to ask Claude, Comment to flag one element, Edit to set a property by hand, Draw to point. Match the mode to the change.
| Ready | Needs work | |
|---|---|---|
| Job fit | You can name the four edit modes and say in one line what each is for | The task is still vague |
| Proof | You can match a big conceptual change to Tweak and a small exact change to Edit | The result is assumed |
| Risk | Low | Breaks when you treat all four modes as interchangeable. Each fits a size of change, |
| Next move | Continue | Clarify first |
Use Ready only when the proof is visible.
Try it (9 min)
Watch out for
- Using Tweak for tiny exact changes like a one-shade color nudge. That spends a full build on something you could set by hand in Edit in a second.
- Forgetting Comment exists and describing where an element is ('the third button down') when you could select it and point at it directly.
- Reaching for Edit to make a big change like 'rebuild this section.' Edit is for one property at a time; a whole section is a Tweak.
- Ignoring Draw when words get clumsy. If you keep writing 'no, the OTHER box,' circle the right one instead.
Paste this into Claude
I'm learning the four edit modes in Claude Design (Tweak, Comment, Edit, and Draw) and I want to know which to reach for in real situations, so I don't waste builds.

Here are some changes I might want to make to a landing page:
[LIST 4-5, e.g. "make the whole hero section feel more premium," "this one button color is slightly off," "the headline font should be one size bigger," "this section in the middle feels too empty," "swap the order of two sections"]

For each change, please:
1. Tell me which of the four modes fits best (Tweak, Comment, Edit, or Draw) and why.
2. Note whether it's a big "ask Claude to rebuild" change or a small "set it myself" change.
3. Give me a one-line rule of thumb so I can choose the right mode on my own next time.
What a good response looks like
Here's the right mode for each change:

1. **"Make the hero feel more premium"** → Tweak. It's a big, conceptual change, so let Claude rebuild that section. Describe the feeling ("more premium, more whitespace, a serif headline").

2. **"This one button color is slightly off"** → Edit. It's a tiny, exact change, so set the color by hand. No need to spend a build asking Claude.

3. **"Headline font one size bigger"** → Edit. Another precise property change you can nudge yourself instantly.

4. **"This middle section feels too empty"** → Draw or Comment. Circle the area (Draw) or select it and note "too empty, add a supporting visual or testimonial" (Comment), so Claude knows exactly where you mean.

5. **"Swap the order of two sections"** → Tweak. It's structural, so ask Claude: "move the testimonials above the pricing."

**Rule of thumb:** big or structural change → Tweak (ask Claude). Tiny exact value → Edit (set it yourself). Pointing at one spot → Comment or Draw.
What good looks like
- You can name the four edit modes and say in one line what each is for
- You can match a big conceptual change to Tweak and a small exact change to Edit
- You understand Comment is for pointing at one specific element, and Draw is for pointing visually
- You can explain why using Tweak for a tiny color change can waste a build
When this breaks
- Breaks when you treat all four modes as interchangeable. Each fits a size of change, so using the wrong one is either slow (Tweak for a tiny fix) or impossible (Edit for a rebuild).
- Breaks when you never learn Edit and ask Claude to rebuild for every pixel-level finish. Small exact changes pile up into wasted builds and a drained allowance.
AI can help with this
Not sure which mode fits? Inside Claude Design, you can always default to Tweak and describe the change in plain words. Claude handles it. The other three modes are time-savers you grow into, not hoops you have to clear.
You can now
You can complete the lesson outcome in Claude Design or in the supporting tool the lesson names.
- You can name the four edit modes and say in one line what each is for.
- You can match a big conceptual change to Tweak and a small exact change to Edit.
- You understand Comment is for pointing at one specific element, and Draw is for pointing visually.
- You can explain why using Tweak for a tiny color change can waste a build.
Key takeaways
Claude Design gives you four edit modes: Tweak to ask Claude, Comment to flag one element, Edit to set a property yourself, and Draw to point visually. Matching the mode to the size of the change saves builds.
- The canvas toolbar has four edit modes: Tweak, Comment, Edit, and Draw.
- Tweak is the everyday mode: ask Claude in plain words to rebuild a part.
- Comment flags one selected element with a note; Draw points by drawing on the page.
- Edit changes one property by hand (color, size, font, weight, spacing), instant and build-free.
- Match the mode to the size of change: big and conceptual goes to Tweak, tiny and exact goes to Edit.
Go deeper